Formatting
Begin by opening your project management spreadsheet provided by the Digital Projects Manager or Digital Initiatives Librarian.
- Find the recording you are working on and open in a new window
- Sign the
copy edit begunfield with your initials - Within the collection you are working on, go to the
Copy Editedfolder to find your recording
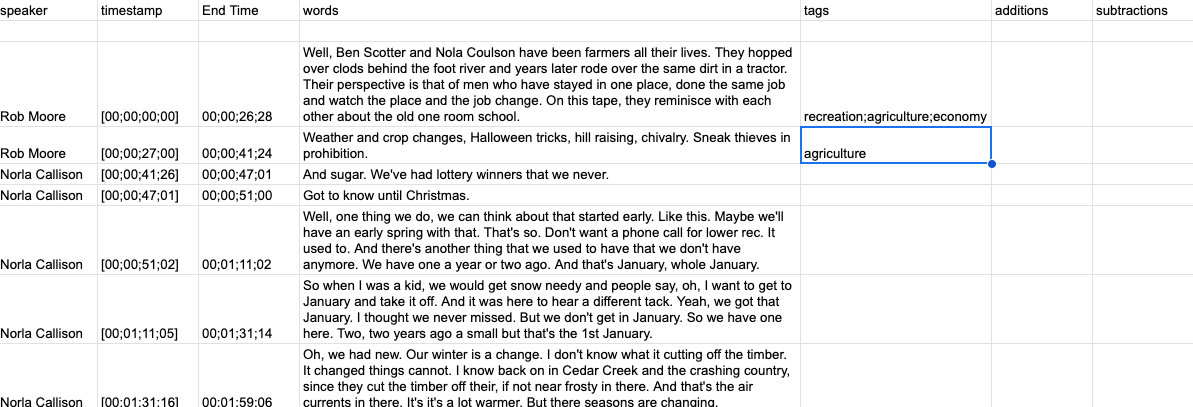
Replace headers with semantics that will work for OHD (case sensitive). Columns A through F:
- Speaker Name > speaker
- Start Time > timestamp (no need to rename the End Time column)
- Text > words
- tags
- additions
- subtractions
If there are empty rows between the lines of dialogue in the transcripts:
- Select column A and select
Create a Filter - Select
Clearand then select Blanks from the dropdown - Delete all of the empty rows
Remove Filter- Add a space between the header and transcript content on row 2
- Add brackets around timestamp
- In D3, add this formula:
="["&B3&"]" - Then drag the formula down to the bottom of the transcript and copy cells
- Delete this content and then paste as values (
control shift V) into the timestamp column
Afterwards, your transcript should look like this:

