Scanning Negatives
The process for scanning film and negative items is similar to scanning an image, but there are a few key differences.
Before You Begin
- Make sure the physical transparency cover is removed from the transparency hood of the scanner. This is a panel that covers the glass plate that houses the backlight for transparency scans.
Adjust Settings
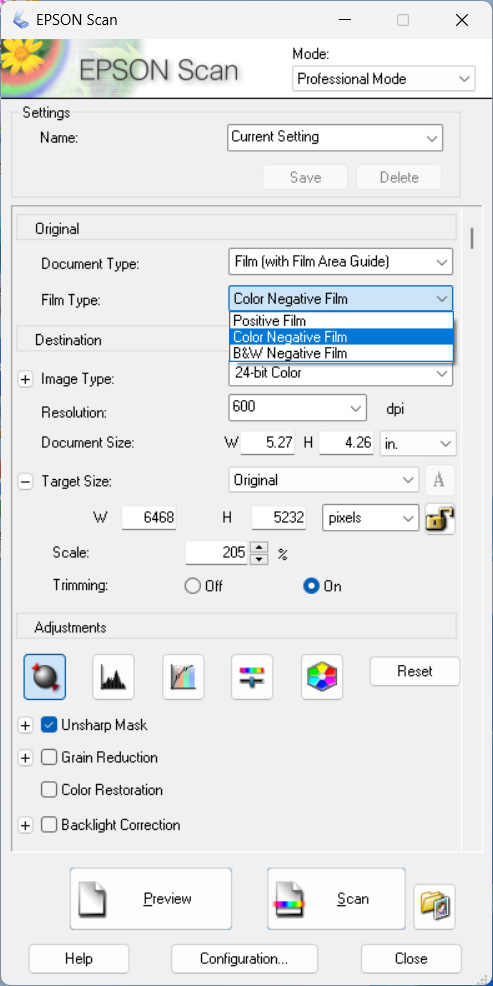
- In Epson Scan, change the Document Type to Film. If you are using a specific type of film guide accessory, select the film option for that guide accessory.
- Select between Positive Film or Color Negative Film as appropriate.

Note: Always scan black and white negatives as Color Negative Film to preserve the full color depth of the negative.
Position Film
- Ensure that the slide or negative is facing the correct direction on the scanner bed. Negatives usually have a shiny front side and a dull/flat back side. The front of a negative should always be facing toward the camera (face down on Epson scanners).
Preview Adjustments
- Negatives should be scanned with the same 600 dpi and 6,000+ pixel length on the long edge that is used for photograph scans.
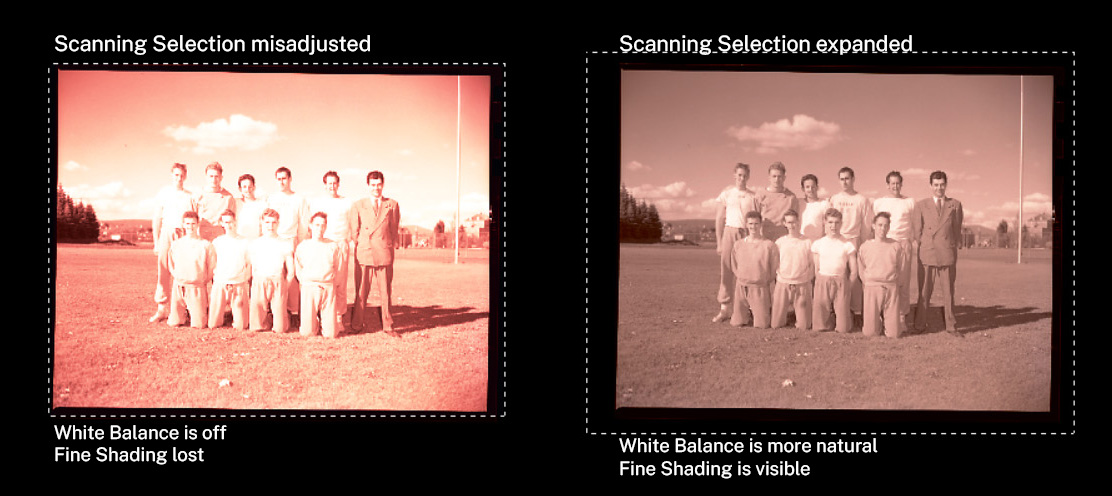
- Once the scan selection and pixel width is adjusted, expand the scan selection around the negative if needed to avoid automatic image adjustments that may wash out the image.

- Check the “File Save Settings” as detailed in the Scanning Images instructions and proceed with scanning.
