Scanning Images
Prepare to Scan
- Go to your personal folder in the ‘Scans’ folder on the C: drive at your workstation. If a supervisor has not done so already, create a folder for the scanning project titled after the collection you’ll be scanning (ex.:
MG 183). Inside that folder, create another folder called ‘tif’. This folder will be the destination for your initial scans.
Staff Only: We recommend creating a folder with a name based on the collection name, stored on your computer’s hard drive (C Drive on U of I computers). Within that folder, create subfolders labeled according to file type. Example folder names: “tiff”, “accessjpg”, “lowresjpg”, “pdf”.
How to Scan an Image
-
Turn on scanner at station. Open EpsonScan scanning software.
-
Place item to be scanned along the left side of the scanning bed (the glass plate), leaving a slight border between item and edge.
-
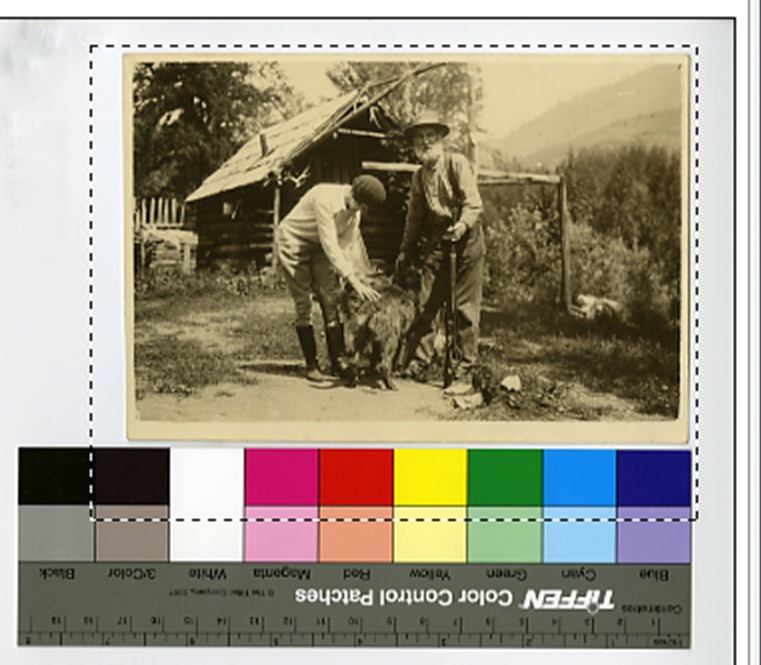
Position the Color Separation Guide so that the “saturated” bar is beside the item being scanned. Be sure to leave a ⅛-inch gap between the guide and the item.
About the Color Separation Guide: The guide improves the ability of the scanner to capture an item’s color. It should always be used for color photos, but not typically for documents or black and white photos, and never for negatives.
- Close the scanner lid and press “Preview” in EpsonScan.
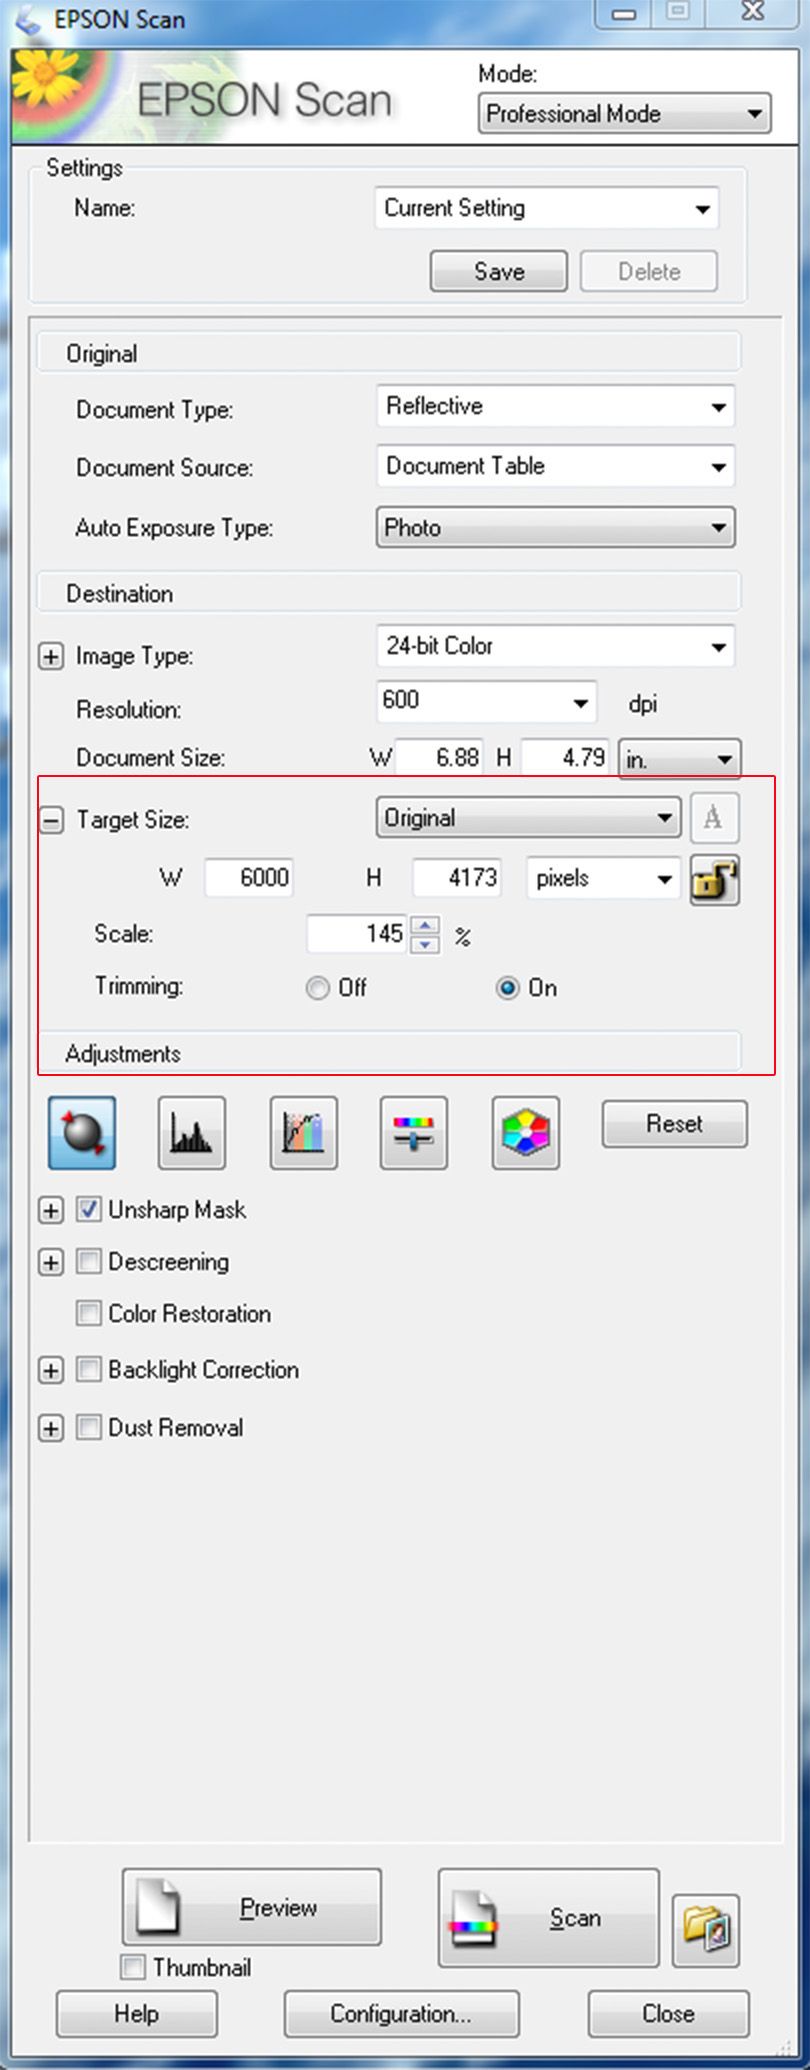
Note: In some cases EpsonScan will default to ‘home’ mode. You will need to switch to ‘professional’ mode to have the most control over what you’re scanning.
- Once the preview scan is finished, use the cursor to draw the selection window around the item and as much of the Color Separation Guide as is needed to color balance the item. There should not be a lot of space between the item and the edges of the selection window; see below:
- Images should be scanned at 600 dpi and should be at least 6,000 pixels on the long edge (we recommend setting the long edge pixels to 6025 or 6050 just to be safe). This measurement is located at the bottom left of the preview panel. The color filter should be set to “none”:
-
Make sure you set the longest pixels before you expand to include the color separation guide.
-
Once your settings are correct, press “Scan”. The “File Save Settings” window will pop up and you will need to:
-
Click “Other” and then “Browse to select the file you want your scanned images to be saved to. This should be the tif folder you already created.
-
Set up the File Name prefix. This should reflect the collection, box number, item number, and any other identifying characteristics like page numbers. See File Naming for complete details. The Start Number should be at 001 if you’re starting a new project, or set to the next sequential number if you’re in the middle of a project.
-
In the Image Format section, the file type should be set to TIFF (*.tif).
-
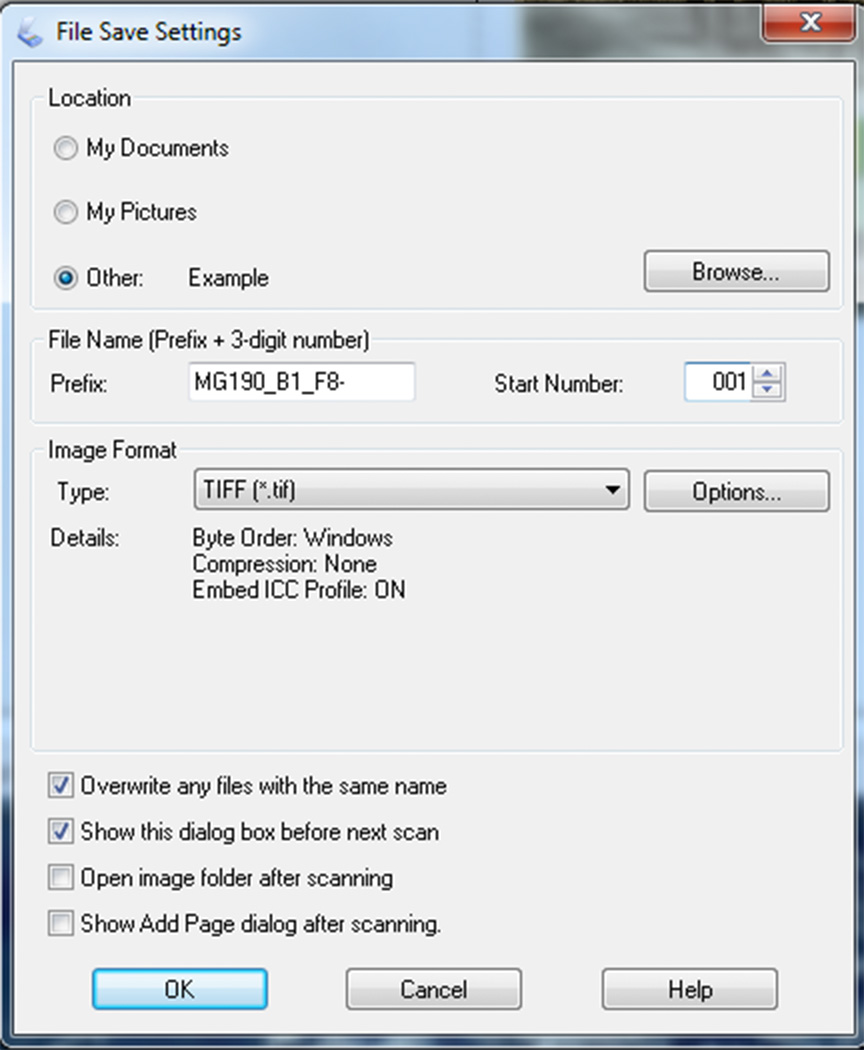
- Press “OK” and the scan will begin.
Note: You might get a message that scanning at high resolution will take some time. That’s okay!