Processing Scans
Student Processes
Images
- If it hasn’t been done already, go to the folder for this scanning project (in your personal ‘Scans’ folder) and make two new folders: one named ‘access jpg’, and the other ‘lowres jpg’.
- Open Photoshop. Go to File > Automate > Batch.
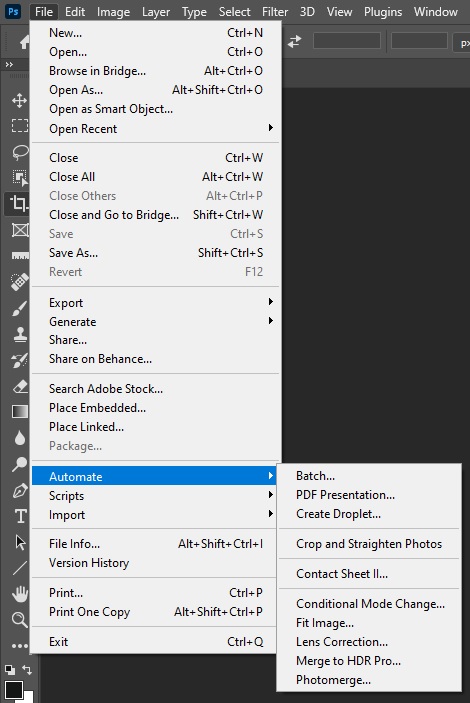
- In the Batch window, select the action ‘tif>jpg’. If this action doesn’t exist on your workstation yet, ask a supervisor how to create it.
- For the Source, make sure folder is selected. Click Choose and select the tif folder where your new scans are stored.
- For the Destination, make sure folder is selected. Click Choose and select the access jpg folder.
- Click OK.
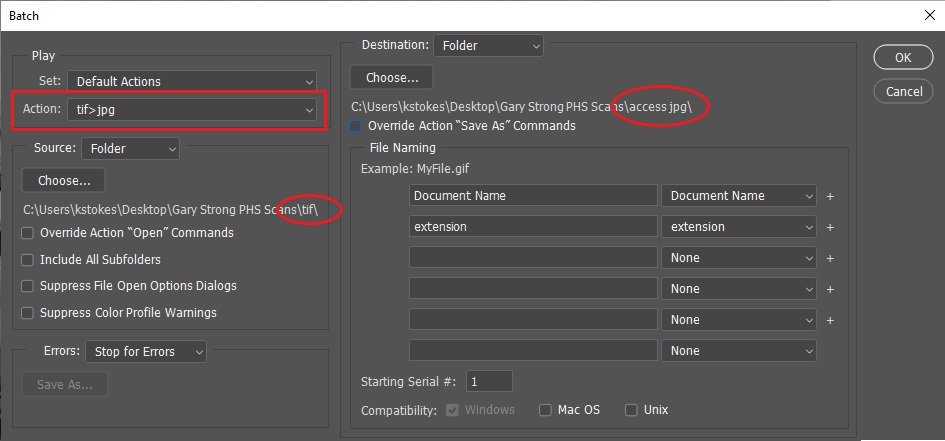
- After Photoshop has completed the action, make sure all the images have scanned to the correct folder.
- In the access jpg folder, open images in Photoshop and crop out the color bar. Balance images using the Levels tool in Photoshop if needed. Save and close images when done with them.
- Once finished with the whole access jpg folder, go back to Photoshop to File > Automate > Batch.
- In the Batch window, select the action ‘access>jpg’. This may also be called ‘300dpijpg’. If this action doesn’t exist, ask a supervisor how to create it.
- For the Source, make sure folder is selected. Click Choose and select the access jpg folder that contains all the adjusted images you just created.
- For the Destination, make sure folder is selected. Click Choose and select the lowres jpg folder. Make sure the file path reads the correct destination.
- Click OK.
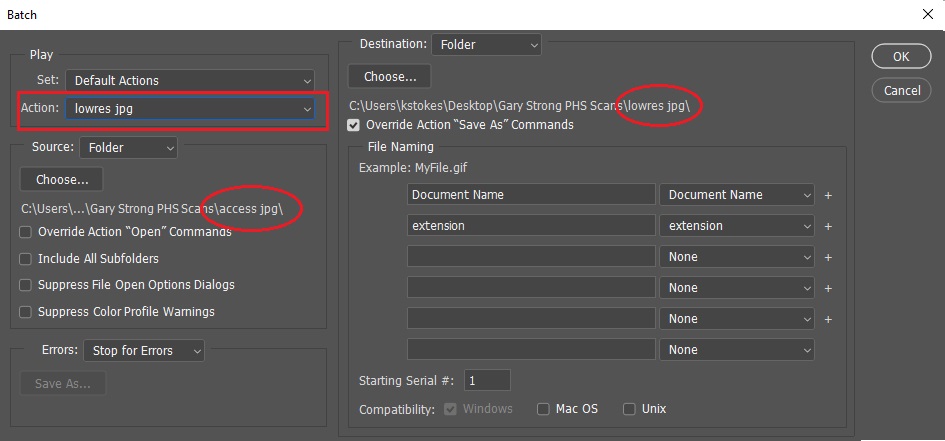
- After Photoshop has completed the action, make sure all the images have been saved to the correct folder.
Documents
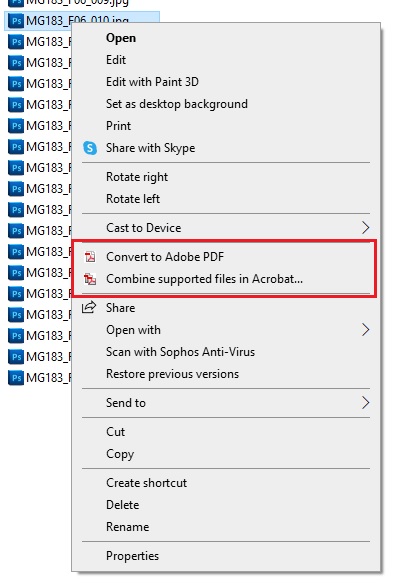
- Select the file(s) to be converted from your lowres jpg folder.
- Right-click selected items and select either ‘Convert to Adobe PDF’ or ‘Combine supported files in Acrobat’. This will open a window in Adobe Acrobat.
- If converting one file into a PDF, choose ‘Convert to Adobe PDF’
- If combining multiple files into one PDF (like a multi-page letter or document), choose ‘Combine supported files in Acrobat’. A new window will pop up—click ‘Combine’.
- When Adobe Acrobat opens, find ‘Tools’ in the top right corner of the screen and select Recognize Text > In this file.
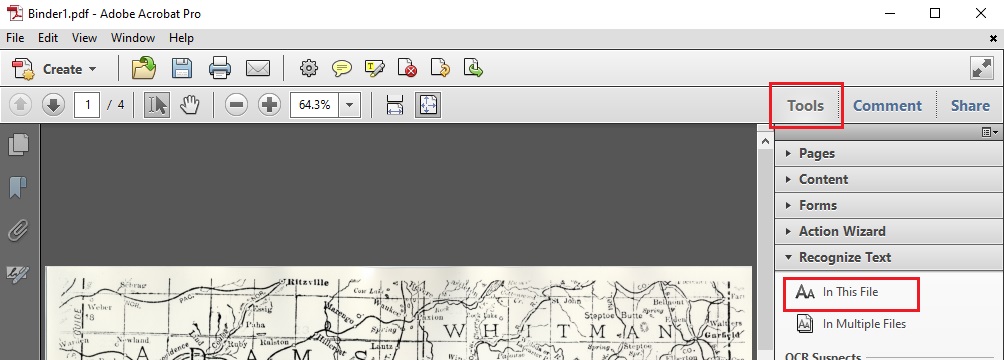
- Wait until Adobe Acrobat completes the command (the document will end up back at the first page).
- Save the document as a PDF following the naming rules established under File Naming.
Staff Processes
Adobe Acrobat Pro DC OCR
- Adobe Acrobat Pro DC has the OCR functions accessed from different menus.
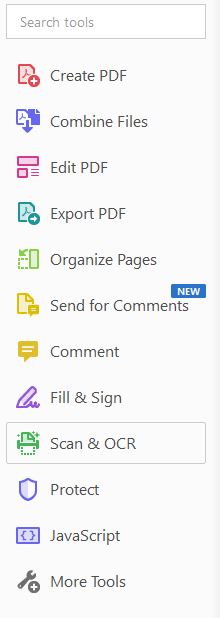
- With a PDF document open, select the “Scan & OCR” tool from the available tools on the right side of the application window.
- Select the “Recognize Text” option on the Toolbar and select “In This File” from the dropdown menu.

- Make sure the Settings are correct. PDFs should be downsampled to 300 dpi to reduce file size issues.
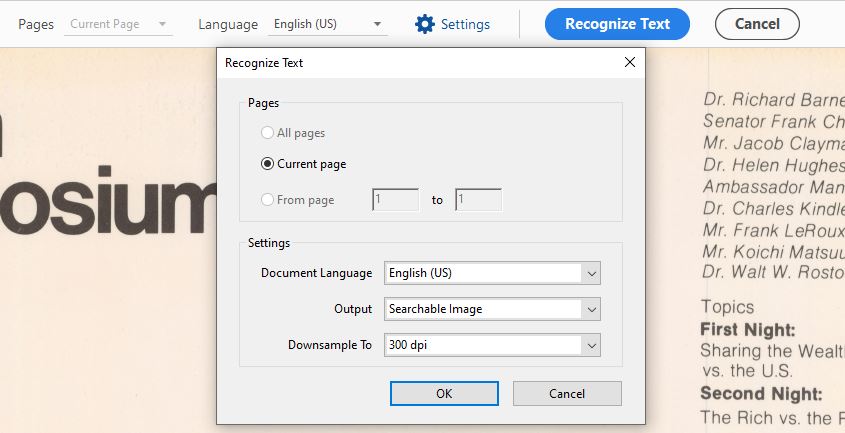
- Click on the “Recognize Text” button to begin the process. Once the process has finished, save and close the file.
Acrobat Batch OCR
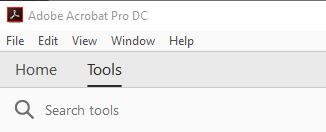
- In Adobe Acrobat Pro DC select the Tools window.
-
Click on the “Scan & OCR” icon in the “Create & Edit” tool group.
-
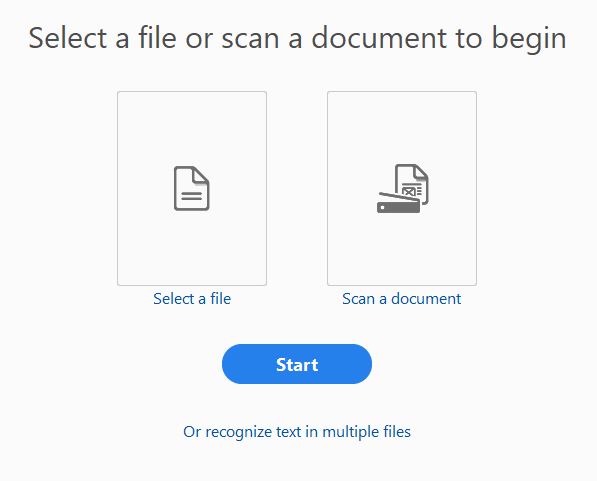
Click on the “Or recognize text in multiple files” option underneath the blue “Start” button.
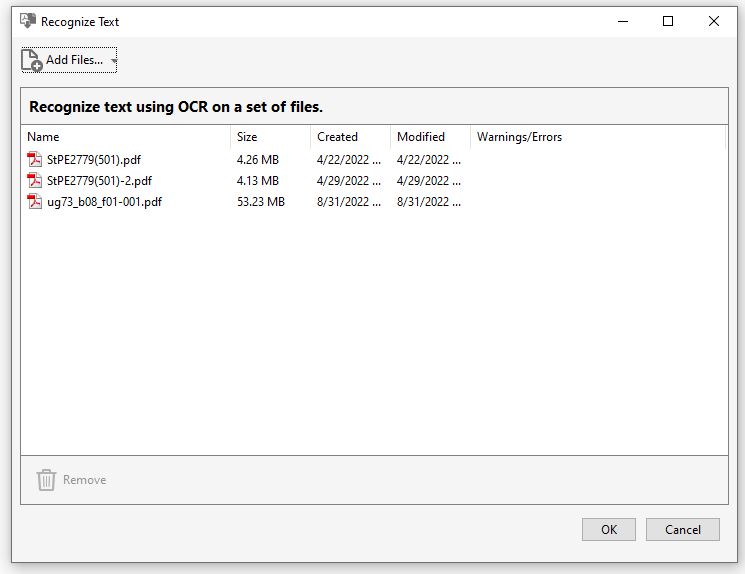
- Add all the files to be reduced either with the “Add Files…” button or by drag and dropping files to the window.
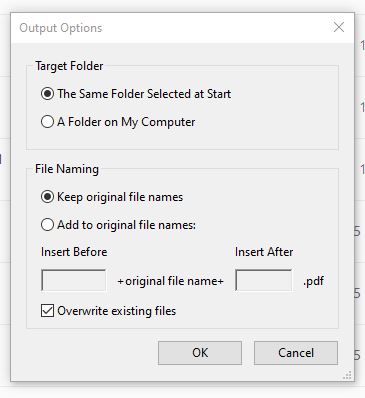
- Choose to save the files to the same folder as the originals or to save all the files to a new folder. Then choose to either use the same file names and overwrite the existing files or add a text string either before or after the original file name. Click OK.
- Check the General Settings dialog that opens. PDFs should be downsampled to 300 dpi to reduce file size issues. Click OK to start the process.
Adobe Acrobat Reduced File Size
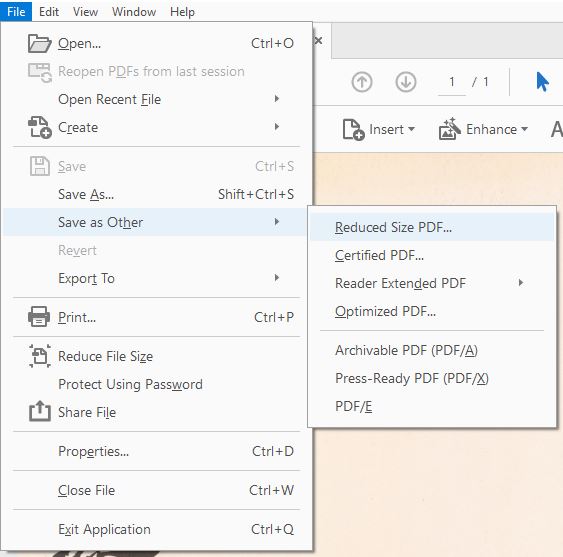
- With a PDF document open in Adobe Acrobat Pro DC open the File menu and select File>Save As Other>Reduce Size PDF…
-
On the dialog window that opens, choose the option “Retain existing” for the compatibility options.
-
To save a single document select OK then navigate to where the file should be saved and the filename to use.
Batch Reduce File Size
-
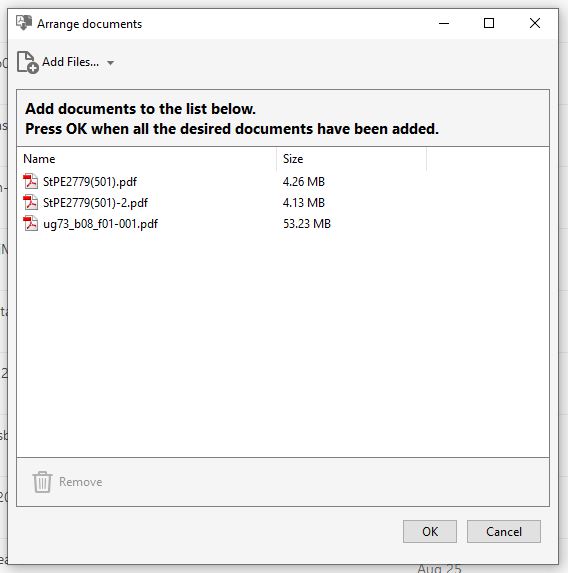
In Adobe Acrobat Pro DC open the File menu and select File>Save As Other>Reduce Size PDF… to open the multiple file interface.
-
Add all the files to be reduced either with the “Add Files…” button or by drag and dropping files to the window.
-
On the dialog window that opens, choose the option “Retain existing” for the compatibility options and click OK.
-
Choose to save the files to the same folder as the originals or to save all the files to a new folder. Then choose to either use the same file names and overwrite the existing files or add a text string either before or after the original file name. Click OK to start the process.

Photoshop Batch Actions
Tiff to Access Jpeg Action
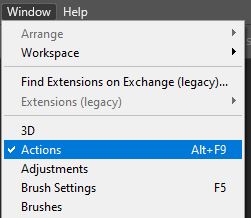
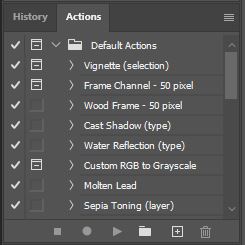
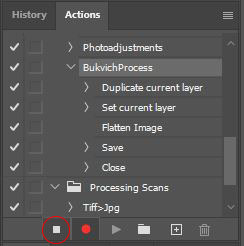
- In Photoshop, make sure you have access to the Actions Window by selecting it under the Window menu (Window>Actions) or with the shortcut Alt+F9.
